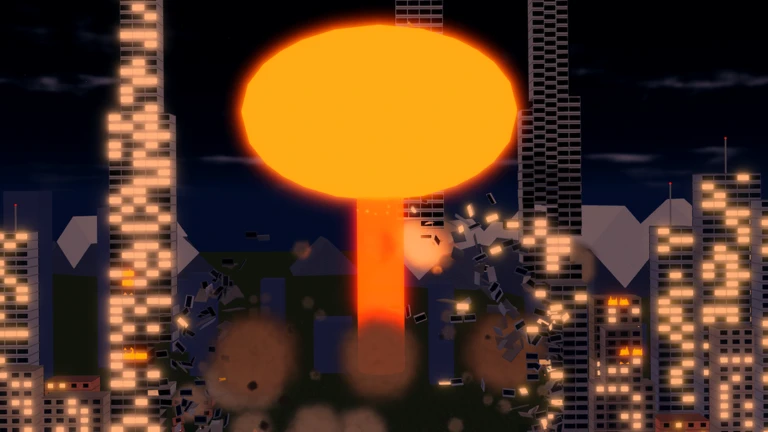
- Smash the City offers 50+ weapons, from missiles and nukes to black holes and orbital lasers.
- Black Hole and Orbital Laser are the top S-tier picks for large-scale late-game destruction.
- Nuke and Meteor deliver the best burst clearing for dense building clusters.
- Tornado and Missile remain reliable, low-cost options for early progression and farming.
- Match your weapon to the map: dense areas favor wide-area tools, isolated targets favor focused strikes.
Smash the City Weapon Overview
Smash the City, the Roblox destruction simulator by Kabooom Crew, is built entirely around one satisfying loop: pick a weapon, aim at a city, and watch physics-driven buildings collapse into coins. With over 50 weapons spread across 11 maps, choosing the right tool for your current progression stage matters more than any single "best" option. This tier list ranks the flagship weapons by area coverage, damage potential, clearing speed, and unlock cost, so you always know which tool to bring to each map.
Video Highlights:
- Physics-based building destruction with cascading collapse
- Wide-area weapons clearing entire blocks in one strike
- Coin rewards scaling with destruction percentage milestones
Note: the video above is a gameplay reference for city-destruction mechanics, not an official Kabooom Crew trailer.
Roblox hosts two experiences named "Smash the City." This tier list covers the Kabooom Crew version (game ID 129425166667725), which features missiles, nukes, tornadoes, meteors, black holes, and orbital lasers across 11 maps. If your game focuses on upgrading strength, speed, and destruction radius instead, you are playing the other version by RUDimentary Games.
Weapon Tier List Rankings
Rankings weigh area coverage, damage output, clearing speed, and progression cost. A lower-tier weapon can still outperform an S-tier pick in the right situation — the Missile remains efficient against isolated targets long after you unlock stronger tools.
| Tier | Weapon | Area Coverage | Damage | Clearing Speed | Best Use |
|---|---|---|---|---|---|
| S | Black Hole | ★★★★★ | ★★★★★ | ★★★★★ | Dense late-game clears |
| S | Orbital Laser | ★★★☆☆ | ★★★★★ | ★★★★☆ | Major structures, priority targets |
| A | Nuke | ★★★★★ | ★★★★★ | ★★★★☆ | Burst farming dense clusters |
| A | Meteor | ★★★★☆ | ★★★★☆ | ★★★★☆ | Mid-to-late clustered targets |
| A | Tsunami | ★★★★★ | ★★★☆☆ | ★★★★☆ | Long lanes of buildings |
| B | Tornado | ★★★★☆ | ★★★☆☆ | ★★★☆☆ | Repeated routine farming |
| B | Missile | ★★☆☆☆ | ★★★☆☆ | ★★★☆☆ | Isolated targets, early game |
Judge weapons by practical destruction speed, not listed damage numbers. A weapon that clears a block in one attack often out-earns a higher-damage tool that needs three strikes to do the same job.
Weapon Category Comparison
Each weapon category fills a distinct role in your destruction toolkit. Understanding these roles helps you switch tools mid-run instead of forcing one weapon through every situation.
| Category | Weapon | Primary Effect | Recommended Map Use |
|---|---|---|---|
| Projectile | Missile | Focused explosive attack on a selected target | Compact areas with separated targets |
| Nuclear | Nuke | Wide-area explosion, high burst destruction | Dense urban areas, target clusters |
| Weather | Tornado | Sweeps an area, damages multiple targets | Open spaces, several targets in range |
| Water | Tsunami | Broad wave across the map | Open sections, long building lines |
| Impact | Meteor | High-impact object drop | Dense zones, durable structures |
| Singularity | Black Hole | Pulls and destroys targets in a large area | Dense areas, many destructibles |
| Orbital | Orbital Laser | Channeled laser strike on a selected area | Large structures, priority targets |
Early Progression
- Missile for isolated targets
- Tornado for grouped objects
- Low cost, consistent farm income
Mid Game Power
- Nuke for burst clearing
- Meteor for clustered damage
- Accelerates 50%-75% milestones
Late Game S-Tier
- Black Hole for dense clears
- Orbital Laser for major targets
- Best coin-per-minute efficiency
Matching Weapons to Maps
Smash the City features 11 maps, and map layout should drive your weapon choice. Dense urban maps reward wide-area tools, while sparse or mixed layouts favor focused strikes and efficient routing.
| Map Feature | Best Weapons | Strategy |
|---|---|---|
| Dense building clusters | Nuke, Black Hole | One strike per block, chain collapses |
| Long building lines | Tsunami | Sweep lanes end to end |
| Isolated large structures | Orbital Laser, Meteor | Focus damage on high-value targets |
| Mixed open areas | Tornado, Missile | Route between targets, avoid dead travel time |
| Reactor zones | Meteor, Orbital Laser | Trigger radiation spread to accelerate destruction progress |
Progress rewards trigger at 25%, 50%, 75%, and 95% city destruction. Plan your weapon switches around these checkpoints — wide-area tools get you to 50% fast, while focused weapons clean up the last 5% toward the 95% milestone.
Assess the Map Layout
Scan for the densest building cluster near your spawn point. Start there to build early destruction progress with minimal travel.
Open with Wide-Area Weapons
Use your strongest area weapon (Nuke, Black Hole, or Tsunami) on the densest cluster to push toward the 25% and 50% milestones quickly.
Switch to Focused Tools
Once clusters are cleared, change to Missile or Orbital Laser for scattered or durable remaining structures.
Claim Milestone Rewards
Collect progress rewards at each threshold before making upgrade purchases, so you always spend with your full balance in view.
Repeat the Fastest Cycle
Lock in the weapon-and-route combination that cleared the map fastest, then repeat it for consistent coin income.
Farming Goals Checklist
Work through these milestones as you build toward the S-tier arsenal. Each goal compounds your coin income, making the next unlock faster.
Weapon Progression Milestones:
- Master Missile and Tornado farming loops on starter maps
- Unlock the Nuke for burst clearing dense clusters
- Reach a 75% destruction milestone in a single run
- Unlock the Meteor and Tsunami for advanced map clearing
- Add Black Hole and Orbital Laser to your late-game toolkit
Before buying any upgrade, compare its practical clearing speed against your current weapon. If the new weapon does not reduce total strikes per map, save your coins for a higher-tier unlock instead.
FAQ
Q: What is the best weapon in Smash the City?
The Black Hole ranks highest overall thanks to its extremely large area coverage and late-game clearing potential, while the Orbital Laser is the top pick for focused attacks on major structures. Both sit in S-tier for different situations.
Q: Which weapons should beginners use?
Start with the Missile for isolated targets and the Tornado for grouped objects. Consistent area coverage beats high single-hit damage in early progression, and both weapons support efficient repeated farming loops.
Q: How many weapons and maps does Smash the City have?
The Kabooom Crew version of Smash the City features more than 50 weapons across 11 maps, including themed environments such as downtown cityscapes and a moon base.
Q: Are there active codes for free coins?
Yes. As of October 2026, the code SMASH was shown on the official Roblox game page and rewards 5,000 coins. Code availability changes with events and updates, so verify on the official game page before redeeming.