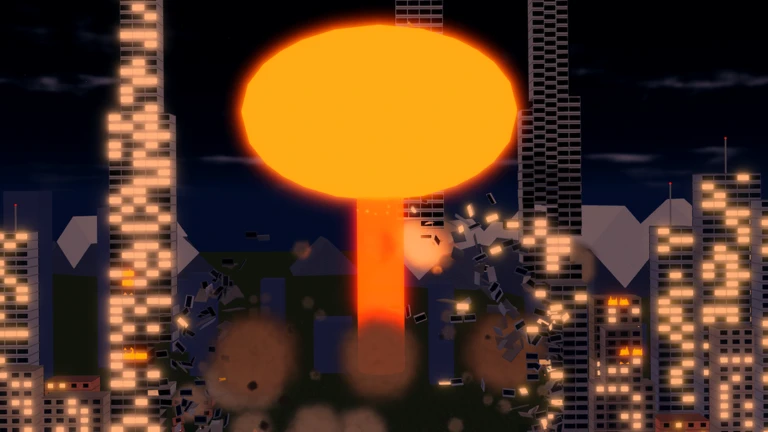
- Smash the City maps: 11 destructible environments including city streets, night skylines, and landmark-themed zones
- Map choice matters: Dense maps clear faster; open maps suit wide-area weapons like Tsunami
- Destruction milestones: Rewards trigger at 25%, 50%, 75%, and 95% progress on each run
- Route planning: Compact loops through adjacent buildings beat random wandering for coin income
- Unlock order: New maps open as you accumulate coins and destruction progress
Understanding the Smash the City Map System
Smash the City is a physics-based destruction simulator on Roblox where every map is a fully breakable city. Developed by Kabooom Crew, the game features 11 maps and 50+ weapons, and the map you choose directly shapes how fast you earn coins, how quickly destruction percentage climbs, and which weapons perform at their best.
Each map follows the same core loop: destroy buildings, watch the destruction percentage rise, and collect milestone rewards at 25%, 50%, 75%, and 95% progress. What changes between maps is the density of targets, the presence of special landmarks, and the terrain that determines which weapons work efficiently.
Dense building clusters favor high-efficiency runs with Nukes and Black Holes, while maps with long sightlines and open lanes reward sweeping weapons like the Tsunami and Tornado.
The table below breaks down the general map categories you will encounter:
| Map Zone | Target Density | Best Weapon Types | Farming Value |
|---|---|---|---|
| Dense downtown blocks | High | Nuke, Black Hole, Meteor | Excellent for full clears |
| Night city districts | Medium-High | Orbital Laser, Missile | Good for focused runs |
| Landmark zones (pyramid, monuments) | Medium | Meteor, Orbital Laser | High value per target |
| Open streets and plazas | Low-Medium | Tsunami, Tornado | Good for route travel |
| Special terrain (moon base and themed zones) | Varies | Black Hole, Nuke | Late-game farming |
Every Map Category Explained
While the full 11-map roster continues to expand through updates, maps generally fall into four functional categories. Recognizing which category a map belongs to tells you instantly how to approach it.
City Core Maps
- Highest building density on the roster
- Fastest destruction-percentage gains
- Ideal for milestone chasing and coin farming
- Best served by Nuke and Black Hole clears
Night and Neon Districts
- Medium-to-high density with vertical towers
- Orbital Laser shines on tall priority targets
- Missiles work well for isolated structures
- Strong mid-game farming value
Landmark Maps
- Feature unique structures such as pyramids and monuments
- Durable targets reward high-impact weapons
- Meteor and Orbital Laser excel here
- Best tackled with upgraded gear
Special Terrain Maps
- Themed environments like the moon base
- Unusual layouts change route planning
- Wide-area weapons dominate open sections
- Typically unlocked later in progression
Maps are added through official updates. The game received an update on October 9, 2026, and the roster continues to grow — check the official Roblox game page for the latest map count.
| Map Trait | What It Means for You | Recommended First Weapon |
|---|---|---|
| Dense clusters | Chain destruction quickly, low travel time | Nuke |
| Tall towers | Focus high damage on single structures | Orbital Laser |
| Wide open lanes | Sweep entire rows in one attack | Tsunami |
| Scattered targets | Precise strikes, minimize wasted shots | Missile |
Matching Weapons to Maps
Weapon selection is the single biggest efficiency factor on any map. A weapon that clears one map in minutes can waste your time on another layout. Use this pairing logic before every run.
| Weapon | Best Map Type | Strength | Weakness |
|---|---|---|---|
| Missile | Scattered, low-density maps | Precise, cheap, always available | Poor area coverage |
| Tornado | Open areas with grouped targets | Multi-target sweep, flexible | Low single-target damage |
| Tsunami | Long lanes and coastal layouts | Massive sweeping coverage | Wasted on scattered maps |
| Nuke | Dense urban cores | Huge burst damage, fast clears | Overkill on sparse maps |
| Meteor | Clustered, durable targets | Heavy impact, good coverage | Slower attack cycle |
| Black Hole | Any dense late-game map | Enormous pull radius, top-tier clears | High unlock cost |
| Orbital Laser | Landmark and tower maps | Focused extreme damage | Narrow area of effect |
Do not bring single-target weapons like the Missile into dense city cores. The clear speed loss is significant — switch to a Nuke or Black Hole the moment you unlock them, and your destruction percentage will climb several times faster.
For milestone pushing, the general hierarchy is straightforward:
- 95% full-clear runs: Black Hole + Nuke combination on dense maps
- 50-75% efficiency runs: Tsunami sweeping through lane-heavy layouts
- 25% quick sessions: Tornado loops through nearby building clusters
Building a Destruction Route: Step-by-Step
A repeatable route is what separates consistent coin income from aimless smashing. Follow this process every time you enter a new map.
Survey the Map First
Before firing, look across the layout and identify the densest building cluster. Mark it mentally as your starting zone — density means faster destruction-percentage gains per attack.
Clear Dense Clusters Early
Use your strongest area weapon on the densest section first. Early concentrated damage pushes you toward the 25% milestone quickly and maximizes each attack's value.
Sweep the Lanes
Move outward through streets and open lanes with sweeping weapons like the Tsunami or Tornado. These sections double as travel routes between remaining target groups.
Finish Priority Structures
Save large or durable landmarks for focused weapons such as the Orbital Laser or Meteor. These targets often carry meaningful progress toward the 75% and 95% milestones.
Repeat the Fastest Cycle
Compare your run times across routes and maps, then repeat the cycle that delivers the most destruction per minute. Reinvest coins into weapon upgrades when faster clears justify the cost.
Track your destruction percentage as you clear. The jump from 75% to 95% is where many players slow down — save one high-impact weapon charge specifically for the final scattered targets so the run never stalls.
Map Farming Goals Checklist
Use this checklist to keep every map session productive:
Every Map Session Should Include:
- Identify the densest building cluster before attacking
- Match your weapon to the map layout
- Push past the 50% destruction milestone
- Clear priority landmarks with focused weapons
- Collect all milestone rewards before leaving
Map FAQ
Q: How many maps are in Smash the City?
Smash the City currently features 11 maps, ranging from dense downtown environments to themed zones such as landmark and special terrain maps. New maps are added through official updates, so the count can grow over time.
Q: Which Smash the City map is best for farming coins?
Dense city core maps are generally the most efficient for coin farming because building clusters let you rack up destruction percentage quickly with area weapons like the Nuke and Black Hole, triggering milestone rewards faster.
Q: How do I unlock new maps in Smash the City?
Maps unlock as you accumulate coins and destruction progress. Focus on efficient clears of your current map, claim milestone rewards at 25%, 50%, 75%, and 95%, and spend earnings on weapon upgrades so you can clear harder maps efficiently.
Q: Does the map I choose affect which weapons work best?
Yes, heavily. Dense maps favor burst area weapons such as the Nuke and Black Hole, lane-heavy layouts suit the Tsunami, and landmark maps with durable structures reward the Orbital Laser and Meteor. Always match your weapon to the layout.
Map rosters and weapon balance change with each update. Bookmark the official Roblox game page and follow Kabooom Crew announcements to catch new map releases as they drop.